
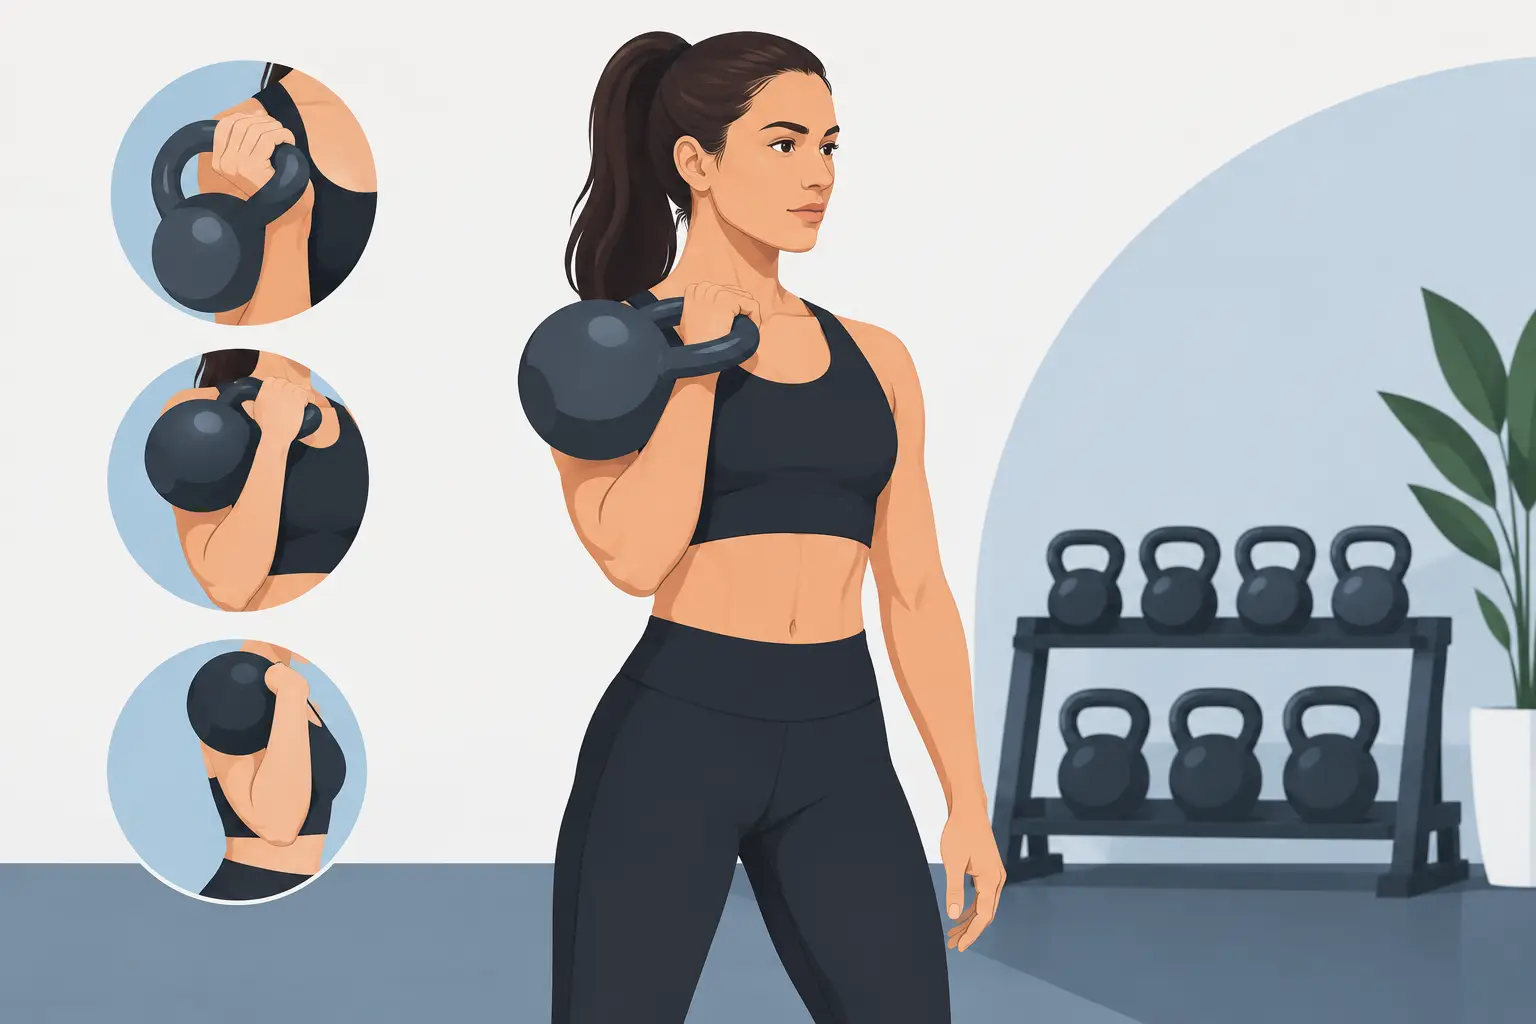
A strong rack is not just where the kettlebell rests between reps. It is the position that connects your clean, press, squat, carry, and get-up. Use this rack position guide to build a stable shelf for the bell, keep your wrist organized, and stop wasting energy fighting the load.
The goal is simple: the kettlebell should feel supported by your skeleton and braced torso, not suspended by a tense forearm. When the rack is correct, you can breathe, move, and produce force. When it is loose, every rep becomes a grip test and your shoulder, wrist, and low back pay the price.
What a Secure Kettlebell Rack Looks Like
In a standard single-kettlebell rack, the bell sits close to the body. Its rounded body rests against the outside of your forearm and upper arm, with the elbow pointed down rather than flared hard to the side. The handle lies diagonally across the palm, close to the base of the fingers. Your wrist stays as neutral as your anatomy allows.
Your forearm should be nearly vertical. Your elbow should be in front of, or very slightly inside, the hip. The bell sits high enough that it does not pull the shoulder forward, but it should not be jammed into the collarbone. Think of creating a compact column from the floor through your hips, ribs, shoulder, and bell.
The shoulder is packed, not crushed down. Keep the shoulder blade controlled on the rib cage while allowing enough freedom to breathe and adjust. Excessive shrugging will tighten the neck. Forcing the shoulder down can also make the rack rigid and uncomfortable. Find a strong, active position you can hold without strain.
With two kettlebells, the same rules apply, but the demands increase. The bells should sit close to the chest with the handles angled inward and the elbows connected to the torso. Do not let the bells drift away from the body. A drifting double rack turns squats and presses into a battle against leverage before the set has started.
Build the Rack From the Ground Up
A rack position is built through the whole body. Fixing your hand while ignoring your feet, pelvis, and ribs rarely works.
Start with your feet rooted into the floor. For standing drills, place them around hip to shoulder width, whichever lets you keep full-foot pressure. Grip the floor lightly with your toes, then maintain pressure through the heel, big toe, and little toe. This gives the hips a stable base.
Next, stack the pelvis and ribs. Do not lean back to make room for the kettlebell. That compensation often appears when the bell is too heavy, the thoracic spine lacks control, or the athlete is trying to breathe only through the upper chest. Lightly brace your midsection as if preparing to take a controlled body shot. Keep the ribs from flaring while leaving room to inhale.
Then bring the elbow toward the body. The exact elbow position depends on arm length, torso shape, shoulder mobility, and the exercise ahead. For most lifters, an elbow that hangs directly beneath the bell or slightly in front of the body provides the best balance of comfort and control. There is no prize for pinning the elbow painfully into the hip.
Finally, relax your grip enough to let the bell settle. You still control the handle, especially during cleans and presses, but death-gripping the handle makes the wrist stiff and the forearm fatigue early. A stable rack is firm through structure, not panic tension.
The Clean Determines the Rack
Many rack problems begin before the bell reaches the chest. If the clean is a hard swing followed by a wrist collision, the rack will feel unstable no matter how carefully you adjust it afterward.
Drive the clean from the hips. As the bell rises, keep it close to your body and guide your hand around the handle. The bell should roll into place rather than flip over and slap the forearm. Your elbow travels down and in as the bell settles.
Avoid curling the kettlebell into position. A curl can work with a light bell, but it shifts the work into the arm and encourages the bell to hang away from the torso. The clean should be powered by hip extension, then finished with precise hand insertion and a quiet catch.
Pause in the rack after every clean during practice. Own the position for one or two breaths before lowering the bell. This removes momentum from the equation and exposes weak points immediately.
Breathing and Bracing Under Load
You need a rack position that lets you breathe under tension. Holding your breath for a single heavy press or squat can be useful, but it is not a solution for every rep, carry, or conditioning set.
Before a hard repetition, inhale low into the abdomen and sides of the rib cage. Brace without lifting the shoulders toward your ears. During longer sets, use short, controlled breaths while keeping the bell close and the trunk organized. If each inhale makes the bell shift or pulls you into extension, reduce the load and rebuild the position.
For rack carries, breathing is the test. Walk slowly enough to keep your ribs stacked over your pelvis. If your torso leans away from a single bell, first try tightening the glute on the loaded side and bringing the elbow slightly closer. If the lean remains, the load or distance is ahead of your current capacity.
Common Rack Position Mistakes
The first mistake is allowing the bell to sit too far from the body. This lengthens the lever, overloads the forearm, and pulls the shoulder forward. Bring the elbow down and keep the kettlebell close to your centerline.
The second is an aggressively bent wrist. Some extension is normal depending on the bell, hand size, and handle shape. Pain is not. If the handle is pressing sharply into the wrist, adjust your grip during the clean so the handle sits deeper and more diagonally across the palm. A competition kettlebell with a consistent handle and body size can make this easier to learn across different weights.
The third is collapsing through the torso. Lifters often solve a weak rack by leaning backward. This may keep the bell from falling forward, but it transfers stress to the low back and makes pressing mechanics worse. Stack the ribs, brace the trunk, and use a bell you can truly own.
The fourth is over-tucking the elbow. Contact with the torso is useful, especially for heavy cleans, front squats, and carries. But jamming the elbow into the hip can restrict breathing and irritate the shoulder. Strong is not the same as forced.
Apply the Rack to Each Lift
The rack changes slightly with the task. For a strict press, start with the elbow under or a little forward of the bell. Keep the forearm vertical as long as possible, then let the elbow move naturally as the bell travels overhead. Do not press from a leaned-back rack.
For front squats, use a compact double rack when possible. Keep the bells close, descend between the hips, and maintain a tall torso without overextending the spine. If your elbows drop during the ascent, reduce the load or reps. The rack must survive the hardest part of the squat.
For carries, choose posture over speed. A heavy single rack carry challenges lateral trunk strength. A double rack carry demands breathing control and upper-back endurance. Walk with purpose, but do not turn the drill into a rushed shuffle.
For get-ups, the rack is a transition point, not a resting pose. Keep the bell close as you roll and rise. A loose bell near the chest can shift unexpectedly when the body changes angle. Move deliberately and keep the shoulder active.
How to Train a Better Rack Position
Practice with a load light enough to create clean repetitions. For many athletes, this means using a bell below their pressing max while they learn to clean quietly, breathe, and hold position. Starting too heavy teaches compensation fast.
Use rack holds of 15 to 30 seconds per side, focusing on posture and calm breathing. Add controlled rack carries for 20 to 40 meters. Then build clean-to-rack pauses, front squats, and strict presses. These drills are not flashy, but they reveal whether your position holds when fatigue starts.
Progress one variable at a time: load, time, distance, repetitions, or complexity. Do not jump to a 32 kg kettlebell because the number sounds serious. Serious training is repeatable training, performed with positions you can defend.
A reliable rack makes every kettlebell lift more useful. Build it patiently, check it under load, and earn every rep from a position strong enough to support it.