
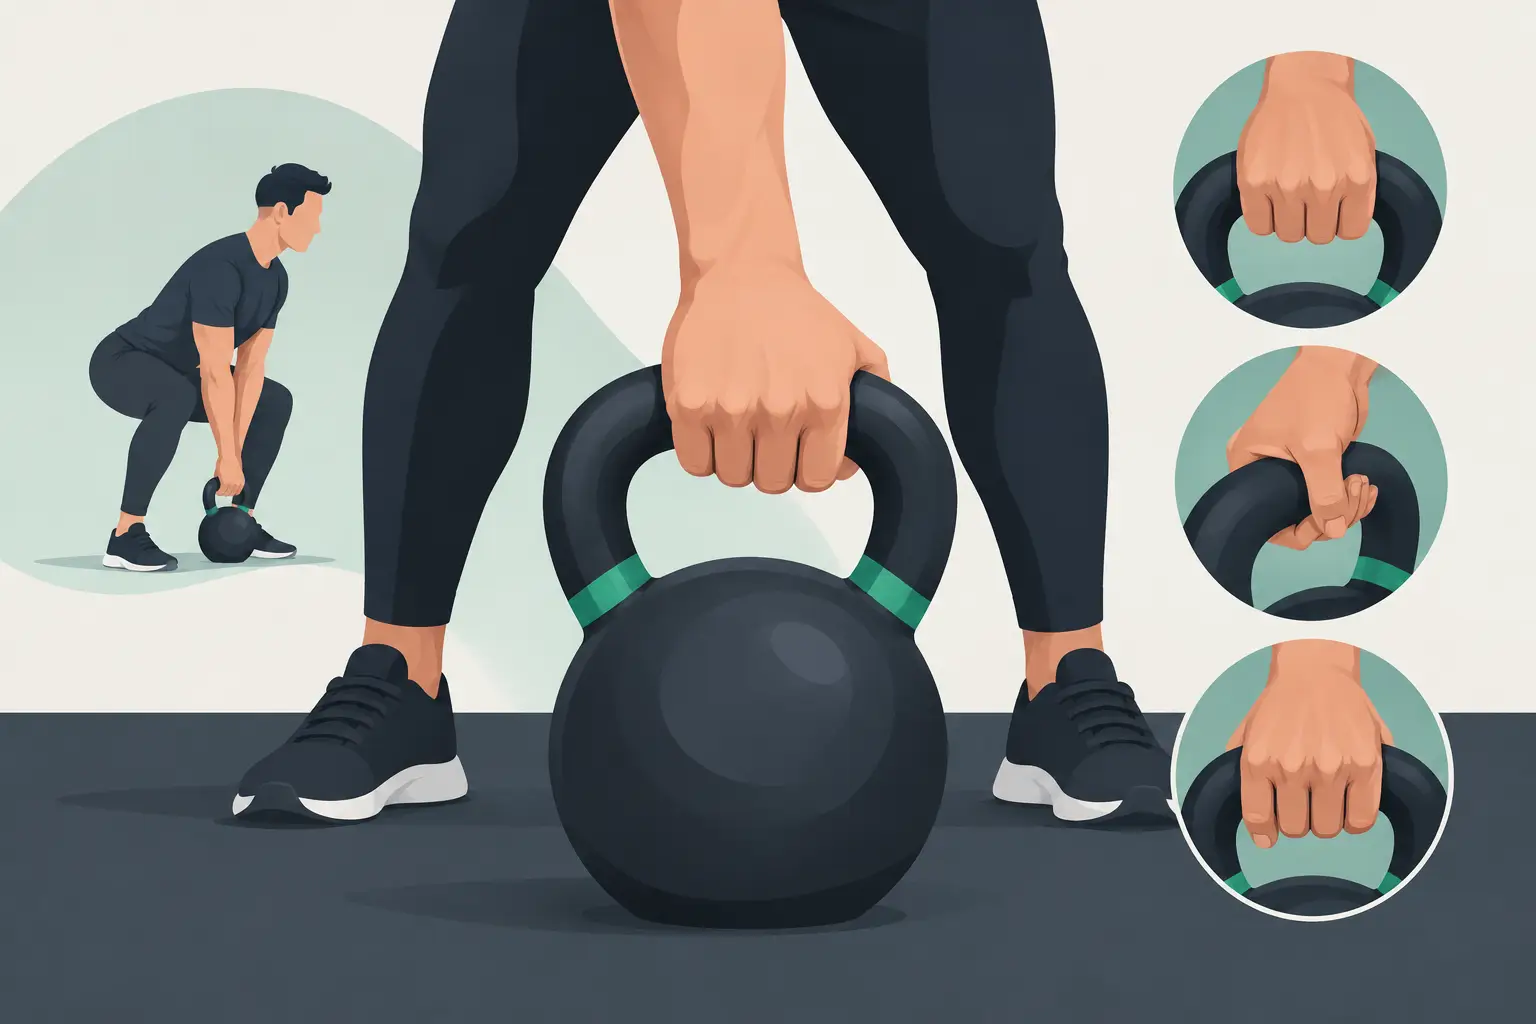
The bell should feel connected to your body, not like an object you are fighting to hold. A proper kettlebell grip setup gives you control before the first rep, protects the skin of your hands, and keeps force moving through the handle instead of twisting your wrist. Get it wrong and even a manageable weight can beat up your palms, forearms, and technique.
Grip is not a single position. A swing, clean, press, and snatch place different demands on the hand. The goal is not to squeeze the handle as hard as possible. The goal is to hold the bell securely while letting it move where the exercise requires.
Start With the Right Handle Position
Place the handle diagonally across the palm, running from the base of the index finger toward the heel of the hand. This diagonal placement usually gives the bell room to rotate during cleans and snatches without pulling a large fold of skin into the handle.
Avoid placing the handle high across the fingers for every exercise. That position can work for a brief swing set, but it often creates friction when the bell rolls around the hand. It also forces the fingers to do work that should be shared by the palm, wrist, forearm, and shoulder.
Your wrist should stay neutral or close to neutral. Do not let it fold back under the bell, especially in the rack or overhead position. A straight wrist creates a stable line from the handle through the forearm. That line matters when the load gets heavier, fatigue rises, or you move from one-arm work to doubles.
Handle size changes the setup. A competition kettlebell has standardized external dimensions across weights, so its handle position and rack feel remain consistent as you progress. A hardstyle cast-iron kettlebell may have a different handle window and thickness depending on weight and model. Neither is automatically better. Learn the grip required by the bell in your hands, then build your progression around consistent equipment when possible.
Proper Kettlebell Grip Setup for Ballistic Lifts
Ballistic lifts demand a grip that can relax and re-engage. If you death-grip the handle from start to finish, the forearms fill up early, the shoulders tighten, and the bell loses its clean path.
The swing grip
For a two-hand swing, hook the fingers around the handle while keeping the thumb closed around it. The handle sits closer to the fingers than it does for a press, but it should not hang from the fingertips alone. Keep the knuckles aligned with the forearm and leave enough room for the handle to move naturally in the backswing.
At the bottom of the swing, the bell should sit high in the hip crease. Do not let it drag low toward the knees just because you are holding on too tightly. Your hands guide the bell. Your hips create the force.
For one-hand swings, use a firm but not crushing grip. Think of keeping the handle anchored in the palm while allowing a small amount of rotation. The bell may shift slightly as it travels between the legs and returns to the top. That is normal. A white-knuckle grip is not.
The clean grip
A clean is where poor grip habits become obvious. If the handle starts deep in your palm and you curl it upward, the bell will crash into the forearm. If it starts too far out in the fingers, it can pull skin and feel unstable in the rack.
Begin with the handle on a diagonal in the hand. As the bell rises, keep the elbow connected to the body and guide your hand around the handle. Do not flip the bell over the wrist. Insert the hand into the handle as the bell wraps into place.
The rack should feel stacked, not strained. The handle rests diagonally across the palm, the bell sits against the forearm and upper arm, and the wrist remains straight. Your fingers can close securely, but they do not need to clamp down at maximum effort.
The snatch grip
The snatch exposes every weakness in grip timing. The hand must loosen enough for the handle to rotate, then reconnect before the bell settles overhead. Hold too tight and the handle grinds across the palm. Hold too loose and you lose control at lockout.
Use a relaxed hook during the pull, then punch the hand through as the bell turns over. The goal is a quiet catch overhead. If you hear the bell slap the forearm, slow down and practice the hand insertion with a lighter weight. More force will not fix a rough turnover.
Build a Stable Grip for Grinds
Grinds are slower lifts: presses, front squats, get-ups, rows, and loaded carries. Here, the bell moves less around the hand, so a more complete grip is useful. Wrap the fingers with intent, close the thumb, and create tension through the hand without bending the wrist backward.
For a strict press, keep the handle low and diagonal in the palm. The knuckles should point upward or slightly inward, depending on your shoulder structure and the bell shape. If the handle sits too high in the fingers, you may feel the wrist extend as you press. Reset it lower before adding load.
In a front rack squat, the grip should support the rack without turning your forearm into the only support structure. Let the bell rest against the body. If you have to squeeze aggressively to keep it from rolling, check your elbow position, wrist alignment, and the way the bell is sitting on the forearm.
For carries, use the grip that matches the carry. A suitcase carry needs a strong closed hand and a level shoulder. A rack carry needs the same stacked rack used for cleans and presses. An overhead carry needs a secure handle, straight wrist, locked elbow, and active shoulder. Do not use grip fatigue as an excuse to let posture collapse.
Use Chalk With a Purpose
Chalk improves friction. It does not repair poor hand position. Use a light, even coat when sweat makes the handle slippery, especially for swings, snatches, carries, and high-rep work. Too much chalk cakes on the handle and can make the surface feel less predictable.
Avoid lotions or oily products before training. If your hands are torn, do not tape over the problem and keep ripping through high-volume snatches. Clean the area, reduce friction-heavy work, and let the skin recover. Training hard does not mean ignoring damage that will limit the next week of training.
Calluses need maintenance. Thick ridges catch on the handle and increase the chance of a tear. Keep them smooth with regular filing, then use moisturizer after training rather than immediately before it. This is basic equipment care for your hands.
Common Grip Errors That Cost Reps
Most grip problems are not solved by stronger fingers. They are solved by better setup and better timing.
A crushed handle is the first common error. It makes the forearms pump out before the hips, legs, and trunk have done their share of the work. Keep enough tension to control the bell, then relax where the lift allows.
The second error is a bent wrist in the rack or overhead position. A bent wrist weakens the structure and often causes discomfort under load. Reposition the handle diagonally and keep the forearm behind the bell.
The third is allowing the handle to scrape across the palm during cleans and snatches. This usually comes from trying to flip the bell, rather than guiding the hand around it. Reduce the load, practice controlled reps, and make the turnover quieter.
Finally, do not blame every grip issue on your technique. A handle that is too thick for your hand, too narrow for a comfortable two-hand grip, or poorly suited to the task can affect training quality. Equipment should challenge your strength, not force you into a compromised position. Incore Sports designs kettlebell categories for repeated, purposeful work, but the right bell still depends on your training goal and hand fit.
Match Grip Practice to Your Training Goal
If your goal is power and conditioning, spend time on relaxed swing and snatch mechanics. If strength is the priority, build a confident rack, press, and carry grip. If you train sport-style kettlebell work, consistent competition dimensions can reduce variables as the weight changes. If you prefer hardstyle training, pay close attention to the specific handle shape and finish of the cast-iron bell you use.
Start every session with a quick check: dry hands, clean handle, neutral wrist, and a grip matched to the lift. Then earn your reps. A disciplined setup turns the kettlebell from a moving problem into a tool you can load, control, and use for years.